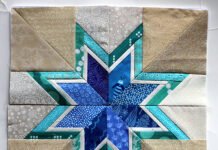
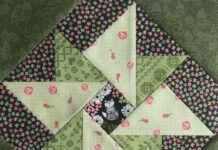
The Hunter Star quilt block is a classic and beloved pattern that adds a beautiful touch of elegance and complexity to any quilt project.
This tutorial will guide you through the creation of this striking design, covering all fabric cuts, measurements, and assembly steps to make your Hunter Star quilt block. With its captivating star pattern, the Hunter Star block is a favorite among quilters for its intricate appearance and versatility.
Here’s everything you need to know to get started with this timeless quilt pattern.

What is the Hunter Star Quilt Block?
The Hunter Star quilt block is a traditional quilt pattern that has a visually dynamic appearance, often incorporating contrasting colors that create a star-like effect. It is known for its intricate, interlocking star design, which can be customized with different colors and fabrics to suit any style. The Hunter Star quilt block provides a fantastic way to create a quilt with depth and movement, and with careful attention to detail, you can create a masterpiece.
In terms of history, the Hunter Star has deep roots in American quilting traditions, with a style that reflects the artistry and skill of quilters over generations. The intricate look of the pattern comes from careful cutting and piecing, and though it may appear complex, the steps to complete it are straightforward with this guide. The Hunter Star quilt block is a fantastic choice for anyone looking to add a touch of tradition to their quilt collection.
When preparing to make this quilt block, you’ll want to gather all necessary supplies, including fabric in two contrasting colors or prints, cutting tools, a sewing machine, and an iron. By following the steps below, you’ll learn exactly how to make precise cuts and assemble your pieces into a stunning Hunter Star quilt block.
Choosing Fabrics and Measurements for the Hunter Star Quilt Block
To begin, select two fabrics with high contrast. The Hunter Star quilt pattern works best when one fabric is light and the other is dark, creating a striking star effect. Each block will require two fabric squares from each color, making it easier to cut and piece together the star’s points. For this tutorial, we’ll create a 12-inch finished Hunter Star quilt block, but you can adjust the size based on your quilt design.
Cutting the fabric accurately is essential for this block to align correctly. For a 12-inch Hunter Star block, you will need two 6.5-inch squares from each color. Each of these squares will then be subcut into triangles to form the distinctive points of the Hunter Star. Keep in mind that precise measurements are key to achieving a clean and professional finish.
Before you begin sewing, it’s a good idea to lay out the pieces to visualize the design. This step allows you to make sure that the contrasting colors align correctly and that the star shape is clear. By taking the time to check alignment now, you’ll avoid potential issues when you start piecing.
Step-by-Step Tutorial: Cutting the Fabric for Hunter Star
- Cutting the Squares
Start by cutting two 6.5-inch squares from each color fabric. You should have a total of four squares—two in each color. These squares will later be subcut to create the triangular pieces that give the Hunter Star quilt block its distinctive look. Accuracy in cutting here is critical for the best results. - Subcutting into Triangles
Next, cut each 6.5-inch square diagonally from corner to corner, creating four large triangles. Repeat this for each of your four squares. You should now have eight triangles in each color, giving you enough pieces to assemble a single Hunter Star block. - Organizing the Layout
Lay out the triangles to form a star shape, ensuring the colors alternate for contrast. This will allow you to verify the positioning before stitching begins. A well-organized layout will help keep the pattern visually striking and prevent misalignment.
Sewing the Hunter Star Block
- Sewing the Half-Square Triangles
Take one triangle of each color and align them right sides together along the diagonal edge. Sew along this edge with a 1/4-inch seam allowance, then press the seam open. Repeat this step for each pair of triangles to form half-square triangle (HST) units. These HSTs are the building blocks of your Hunter Star quilt block. - Assembling the Rows
Once you’ve sewn the HST units, begin arranging them in rows to complete the star design. Typically, the Hunter Star pattern has four rows, each consisting of four HST units. Align the seams carefully as you sew each unit together, checking that the points of the stars meet cleanly to create a cohesive look. - Pressing Seams and Finishing the Block
After sewing each row, press the seams either to one side or open, depending on your preference and the thickness of your fabric. Pressing carefully will ensure a flat, professional finish. Finally, sew the rows together to complete the 12-inch Hunter Star quilt block. A quick press of the block will give it a neat appearance and make it ready for assembling into a larger quilt.
Tips for Perfecting the Hunter Star Quilt Block
- Use a Quarter-Inch Foot
Maintaining an accurate 1/4-inch seam allowance is essential for quilting. Using a quarter-inch foot on your sewing machine can help you achieve consistent seams, which will make piecing much easier and ensure that all points match perfectly. - Chain Piecing for Efficiency
When working on multiple blocks, try chain piecing, sewing several pieces in succession without cutting the thread. This method speeds up your workflow and can save thread, making the process more efficient. Chain piecing also helps keep your pieces organized. - Press Seams Carefully
Properly pressed seams make a significant difference in the final appearance of your quilt block. Use a pressing cloth if necessary to protect delicate fabrics, and avoid stretching or warping the fabric as you press. Pressing with care ensures that your Hunter Star block will lie flat.
Completing Your Hunter Star Quilt
Once you’ve completed a Hunter Star quilt block, you can replicate it to create a full quilt. Consider varying the color scheme or using multiple shades for a more dynamic look. The versatility of the Hunter Star design makes it ideal for large quilts, wall hangings, or even smaller projects like pillows. Experiment with your layout and colors to see the wide range of effects this pattern can produce.
The Hunter Star quilt pattern is a fantastic choice for quilters of all skill levels who want to create a traditional yet striking design. By following this tutorial and paying careful attention to detail, you’ll be able to create a quilt block that is both beautiful and enduring. Enjoy the process and feel free to personalize your quilt with fabric choices that reflect your unique style!


